Ever seen those DVD movies that have been encoded to 300Mb MKV
(Matroska) files with virtually no picture-quality loss & wondered
how it's done? I just love the Mastroska format, and after a little
experimentation, found a really easy method for doing it - with a great
little freeware program called Handbrake - so just thought I'd share this for anyone interested.
Now, I realize there are other great compact formats (like Mp4 & WebM) - but these compact Matroska (MKV) files are fast becoming a defacto standard for storing/sharing movie files, and beat the XVid, DivX, AVI, (etc...) formats hands down. You can achieve the same picture quality as XVid but with just half the file-size.
So basically, this is a really simple method for encoding a full-size DVD movie into a 300Mb MKV (Matroska) video file - which is a really efficient way to back up your video collection.
........................................................................
Procedure:
Grab Handbrake (v0.9.5) from here:
http://handbrake.fr/downloads.php
First up, Handbrake can't handle protected DVDs, so if the movie you wish to encode is on a commercial disc, then you'll need to strip the disc-protection with something like DVDShrink, first. No need to shrink the movie at this stage - just make a 1:1 copy of it on your HDD (with the disc-protection removed).
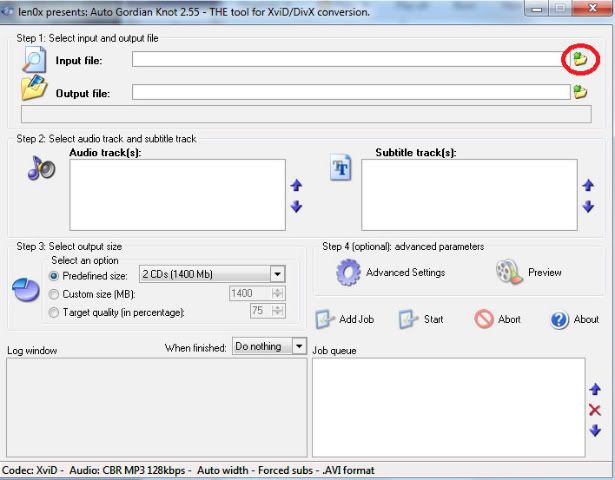
Step-1: Fire up Handbrake.
Step-2: Import the DVD movie (or video file) you wish to encode. Handbrake will import just about any kind of video file.
Step-3: You can leave Handbrake set to all its default settings, except for one - this is the setting which allows us to achieve the magic 300Mb file size.
Note:
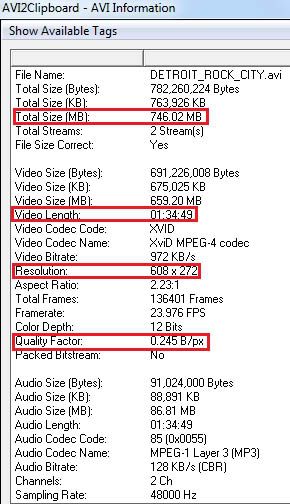
300Mb is our typical outputted filesize for a standard DVD movie of 90-minutes (without the extras). To get good picture quality, the basic formula to work from is to remember that 30-minutes of video-footage (regardless of the file-type you're inputting), should equate to 100Mb of outputted Matroska (.MKV) file.
Now, I realize there are other great compact formats (like Mp4 & WebM) - but these compact Matroska (MKV) files are fast becoming a defacto standard for storing/sharing movie files, and beat the XVid, DivX, AVI, (etc...) formats hands down. You can achieve the same picture quality as XVid but with just half the file-size.
So basically, this is a really simple method for encoding a full-size DVD movie into a 300Mb MKV (Matroska) video file - which is a really efficient way to back up your video collection.
........................................................................
Procedure:
Grab Handbrake (v0.9.5) from here:
http://handbrake.fr/downloads.php
First up, Handbrake can't handle protected DVDs, so if the movie you wish to encode is on a commercial disc, then you'll need to strip the disc-protection with something like DVDShrink, first. No need to shrink the movie at this stage - just make a 1:1 copy of it on your HDD (with the disc-protection removed).
Step-1: Fire up Handbrake.
Step-2: Import the DVD movie (or video file) you wish to encode. Handbrake will import just about any kind of video file.
Step-3: You can leave Handbrake set to all its default settings, except for one - this is the setting which allows us to achieve the magic 300Mb file size.
Note:
300Mb is our typical outputted filesize for a standard DVD movie of 90-minutes (without the extras). To get good picture quality, the basic formula to work from is to remember that 30-minutes of video-footage (regardless of the file-type you're inputting), should equate to 100Mb of outputted Matroska (.MKV) file.
eg. A 90-minute movie will output as a 300Mb Matroska file. A 45-minute TV program will output as a 150Mb Matroska file.
Obviously
you can make the outputted file smaller or larger if you wish, but this
formula creates an optimal balance between picture-quailty &
file-size.
So, with Handbrake configured to its default-settings, make the following single adjustment (see image below):
- Click on the Video tab
- Select the radio-button titled, Target Size (MB)
- Enter the size in MB, using the formula outlined above in red. (ie. 300Mb if movie is 90-minutes long)
- Hit the Start button.
![[Image: 0ca68436012db0f120f24.jpeg]](http://img.loldepot.com/0ca68436012db0f120f24.jpeg)
That's it! It's that simple.
But be patient with the encoding process. Actual processing time will vary according to the size of movie & on your own computer specs. But as an average, expect it to take at least an hour to encode a full-size movie.


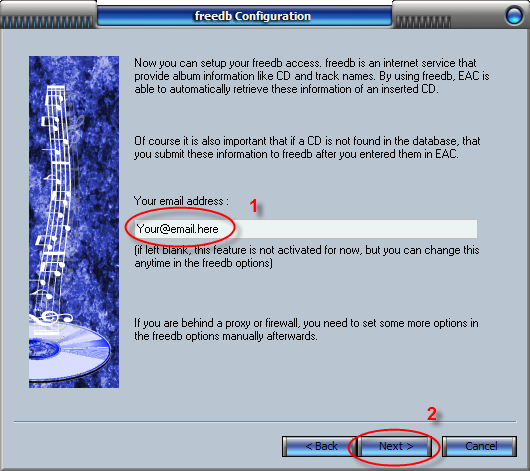
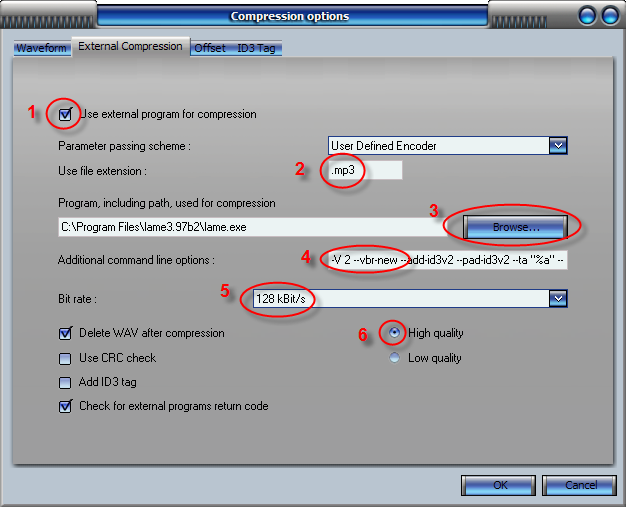
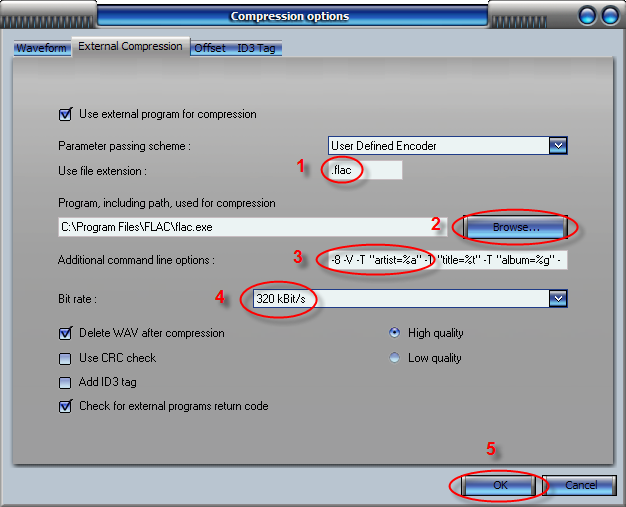
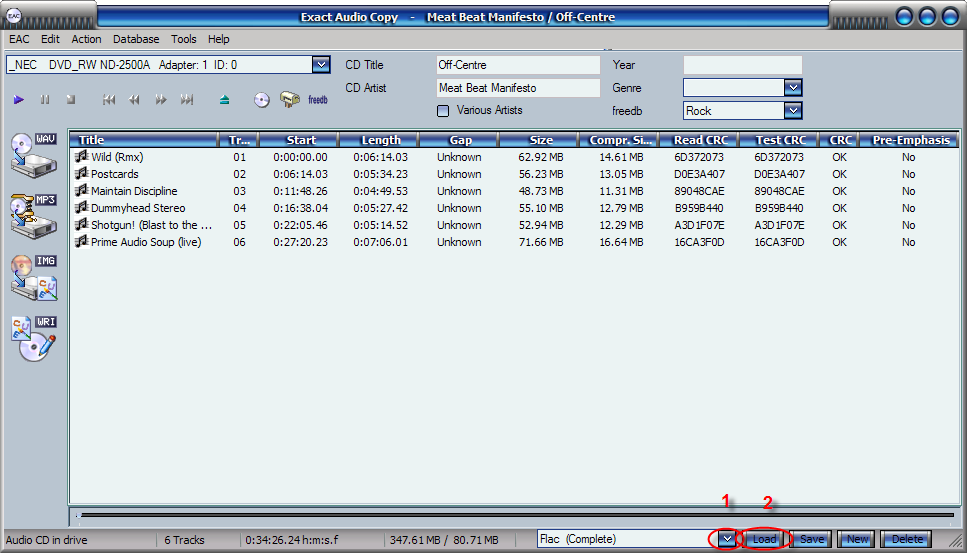
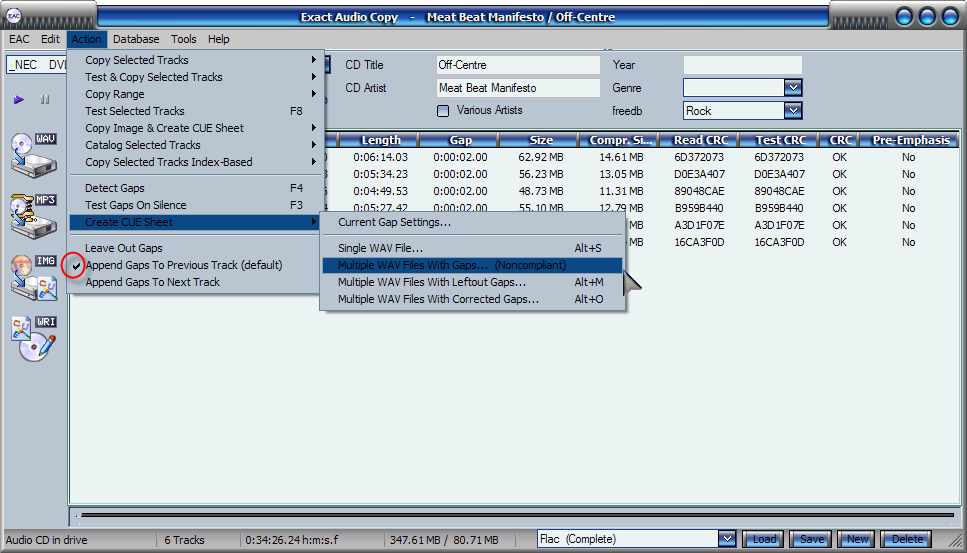
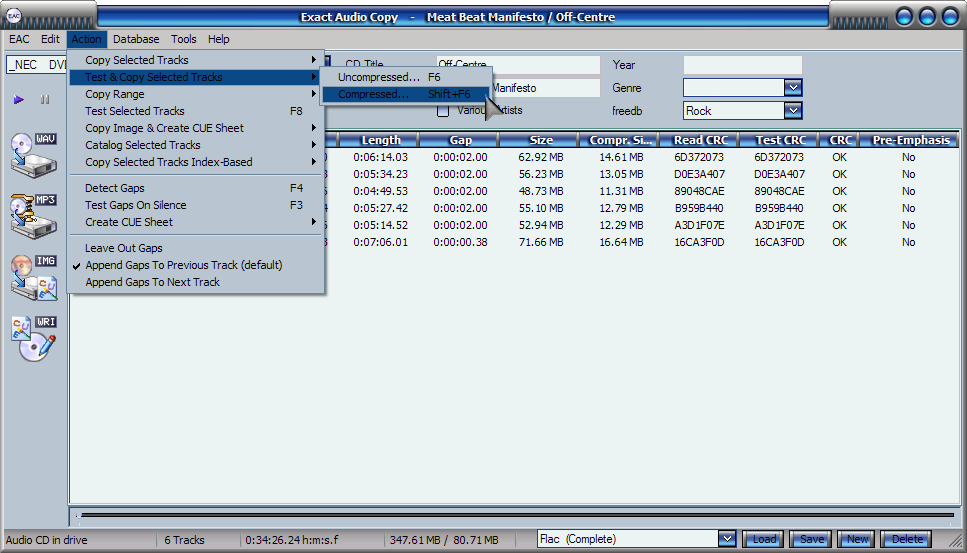
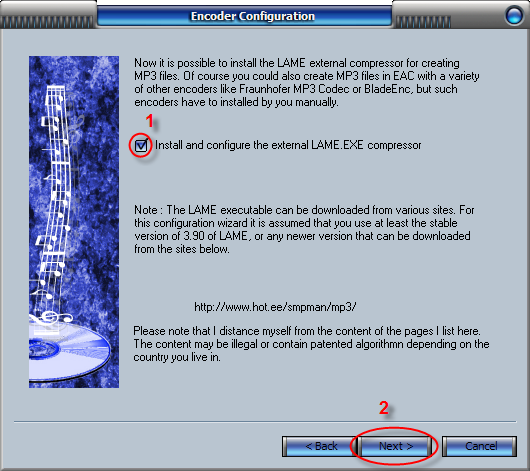
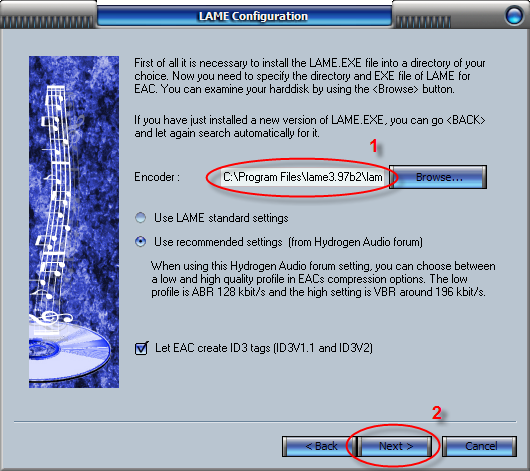
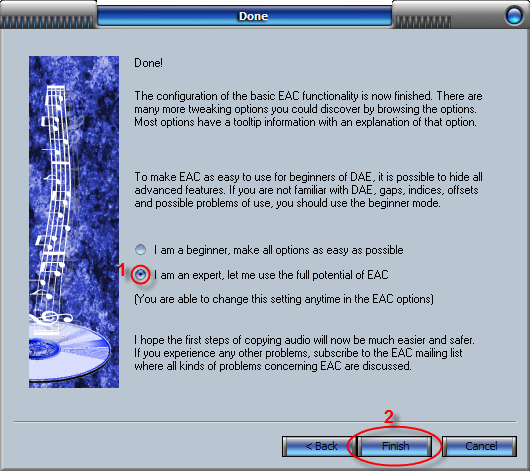
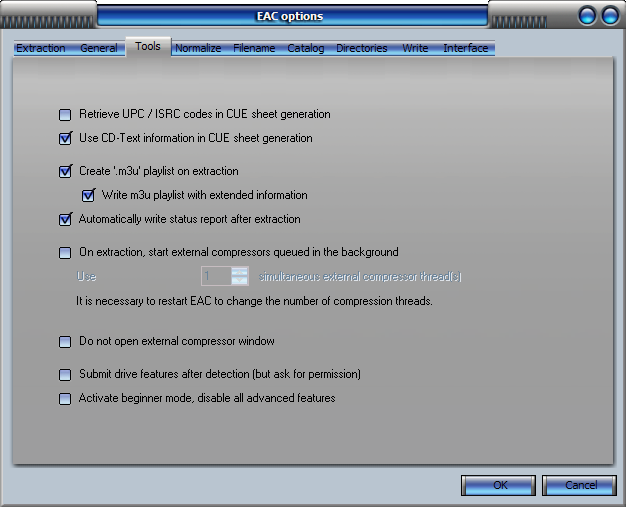
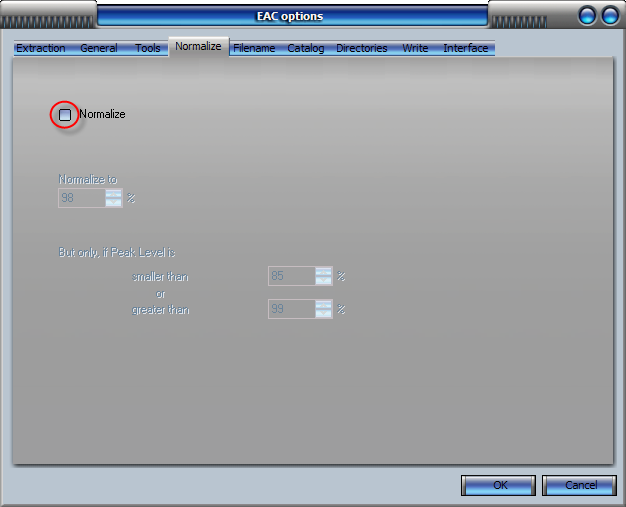
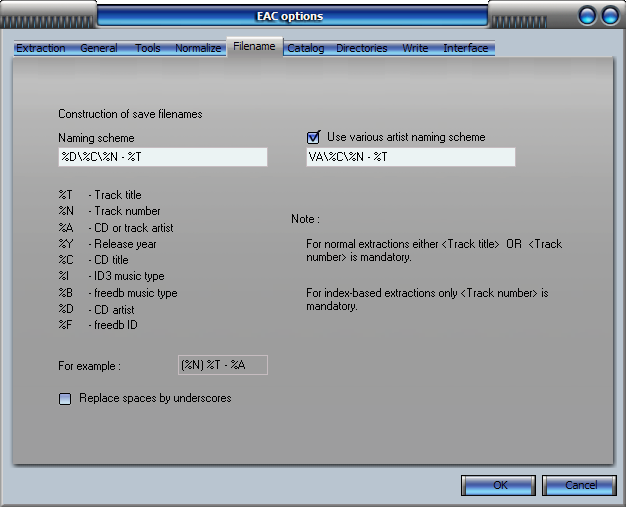
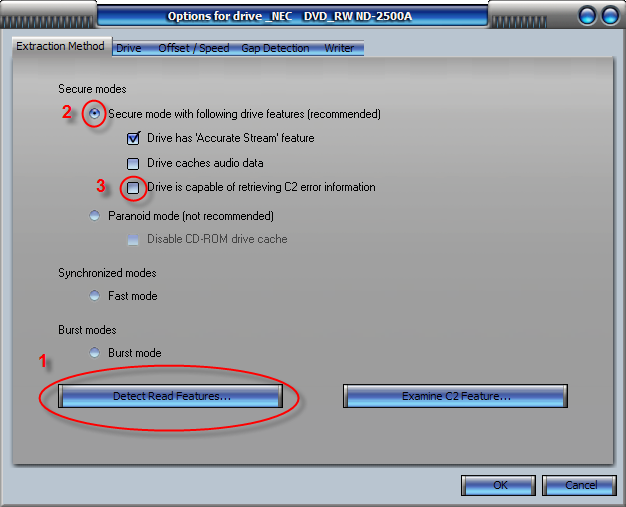
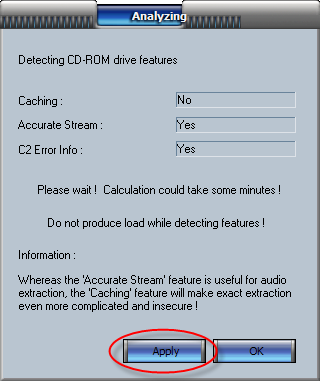
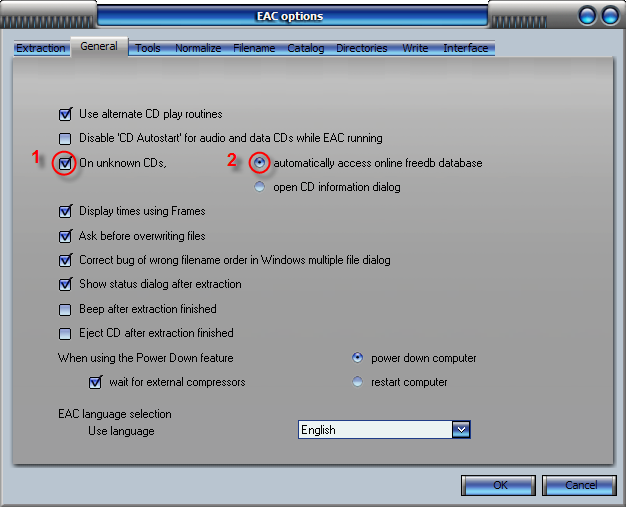 This is a basic guide to configure Exact Audio Copy (EAC) with preset profiles that will allow the choice of ripping Cd's and compressing the output to MP3 (190 VBR (APS), 245 VBR (APX) 256 CBR & 320 CBR (API)) and FLAC.
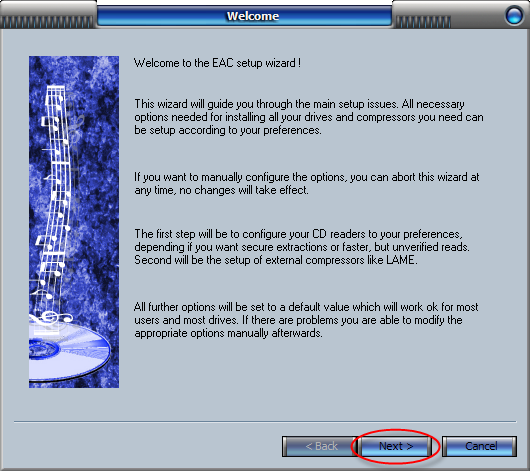
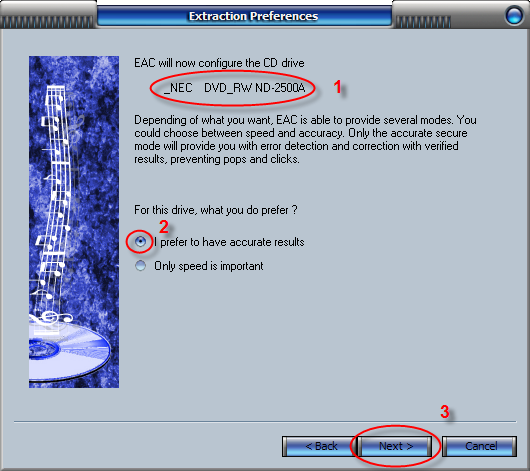
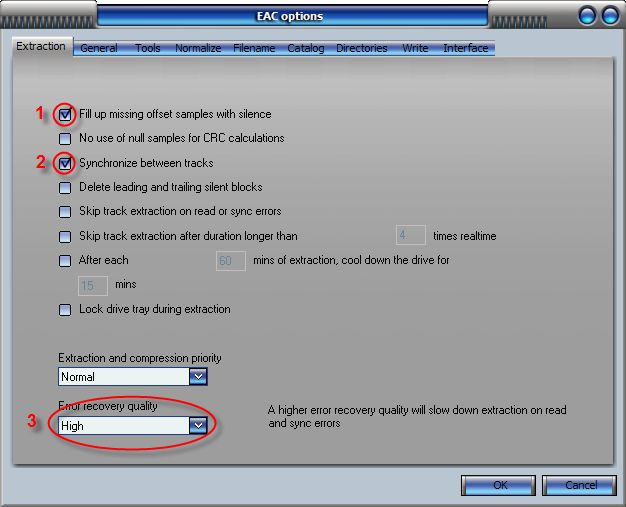
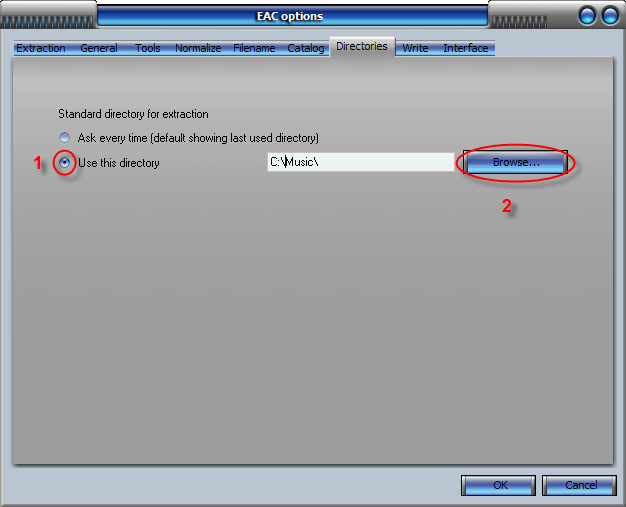
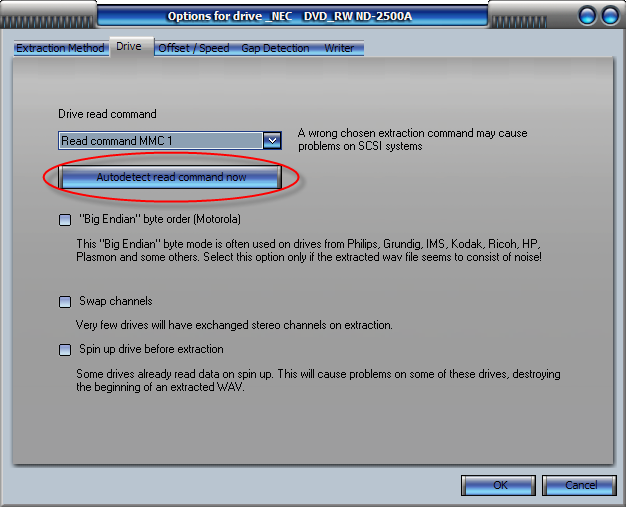
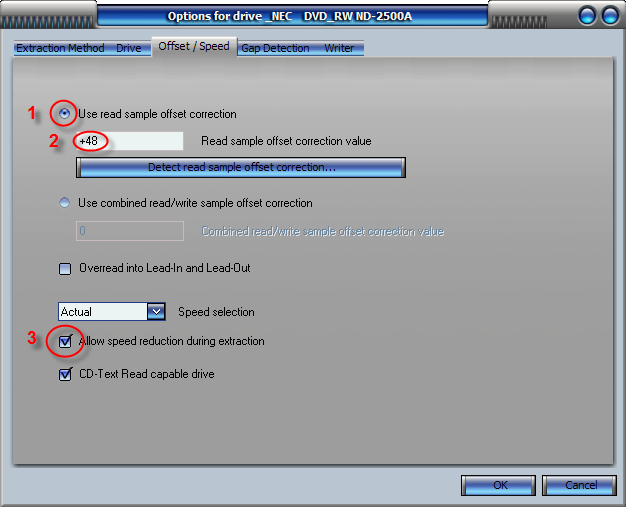
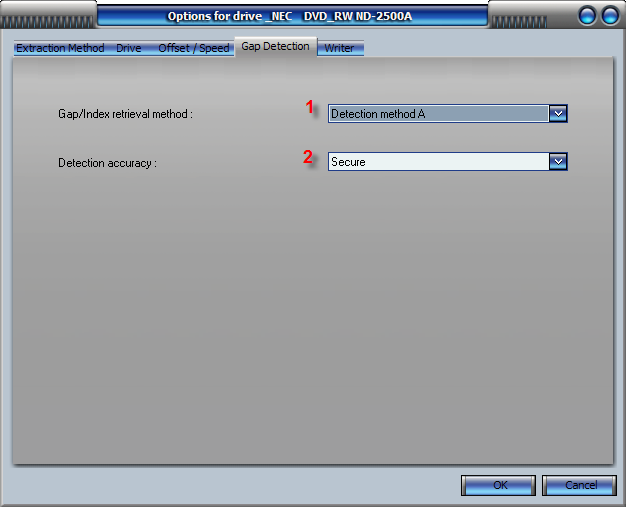 C: Offset / Speed Tab.