Pages

Ads 468x60px

Showing posts with label Mobile phones Tips. Show all posts

Thursday, 6 December 2012

3G Settings for Airtel - Vodafone - Idea - BSNL - Docomo - and Many More

After much hype and hoopla over spectrum allocation finally we now have 3G services across India from private players along with state-owned BSNL and MTNL. The private players including Bharati Airtel, Vodafone, Idea, Reliance, STel, Aircel and Tata Docomo is offering high bandwidth third-generation telephony services clubbed with various data packs in the circles where they have won license to operate. The state-owned MTNL and pan India operator BSNL have been in market much before the introduction of 3G services by private players and is doing well.


Be it smartphone or a tablet device you need to activate 3G on your existing SIM card to get settings automatically for using 3G data services. While most of the smartphones can automatically enable the settings you get from service providers there may be situations where you have to manually edit and configure 3G APN settings.
In order to use 3G services you need to choose and enable 3G network on your handset (UMTS/Dual mode). Once you have enabled 3G and your phone is ready to accept 3G network data you can go ahead edit or set up a new Access Point Name (APN) profile. Here is step-by-step guide on how to configure/ create a new APN profile in iOS (iPhone, iPad), Android and Symbian.

How to configure data network in iOS:

1. Go to Settings> General> Network.
2. Under “Network” settings select “Cellular Data Network”.
3. Add APN (below post).
4. Leave Username and Password blank.
5. Done
iPhone-iOS-APN
How to configure APN settings in Android:

1.Go to Menu> Settings> Wireless & networks.
2. Now select “Mobile networks” and then “Access Point Names”.
3. Click “Menu” and then “New APN”.
4. Enter Name and APN (below).
5. Leave Username, Password and other entries blank.
6. Save and activate.
Android-APN-Settings
 How to configure APN settings in Symbian:

1. Go to Menu > Settings > Configurations.
2. Select Personal Configuration settings > Add.
3. Fill in Account Name.
4. Select Access Point Settings > Bearer Settings.
5. Enter the Access Point Name (APN).
6. Leave Username and Password blank.
7. Go back to Personal Configuration menu.
8. Select the Account Name and click Option and choose Activate.
9. Done.
 1. BSNL 3G APN Settings


BSNL with license to operate pan India expect for Delhi and Mumbai where MTNL will be in place. Try to set the following APN under mobile phone or data card settings,
Name: Airtel
APN: bsnlnet
gprssouth.cellone.in (South Zone)
gprsnorth.cellone.in (North Zone)
Leave all other settings blank

2. Airtel 3G APN Settings


Bharati Airtel has won 3G spectrum license to operate in Delhi, Mumbai, Andhra Pradesh, Karnataka, Tamil Nadu, Uttar Pradesh (West), Rajasthan, West Bengal, Himachal Pradesh, Bihar, Assam, North East, Jammu & Kashmir. Go to your phones mobile network settings and add a new connection or edit existing network,
To activate send SMS as 3G to 121
Name: Airtel
APN: airtelgprs.com
Leave all other settings blank
 

3. Vodafone 3G APN Settings 


Vodafone won spectrum for Delhi, Mumbai, Maharashtra, Gujarat, Tamil Nadu, Kolkata, Haryana, West Bengal and Uttar Pradesh (East).
To activate send SMS ‘ACT 3G’ to 111
Name: Vodafone
APN: www
Leave all other settings blank
 

 4. Tata Docomo 3G APN Settings (Updated)


Tata Docomo won spectrum licence and is operating in Maharashtra, Gujarat, Karnataka, Kerala, Punjab, Haryana, Uttar Pradesh (West), Rajasthan and Madhya Pradesh. Read our Tata Docomo 3G
To activate 3G SMS ACT3G to 53333
Name: Tata Docomo
APN: Tata.Docomo.Internet
Leave all other settings blank

5. Reliance 3G APN Settings 


Reliance Communications has won spectrum in Delhi, Mumbai, Kolkata, Punjab, Rajasthan, Madhya Pradesh, West Bengal, Himachal Pradesh, Bihar, Orissa, Assam, North East, Jammu & Kashmir.
To activate send SMS to 51234 with plan code.
Name: Airtel
APN: rcomnet” or “smarinet”
Leave all other settings blank
 

6. Aircel 3G APN Settings 


Aircel has won spectrum license in Andhra Pradesh, Karnataka, Tamil Nadu, Kolkata, Kerala, Punjab, Uttar Pradesh (East), West Bengal, Bihar, Orissa, Assam, North East and Jammu & Kashmir choose 3G network on your handset (UMTS/Dual) to access 3G service Otherwise, you can access portal using same the GPRS connections settings.
To activate send “START 3G” to 121
Name: Airtel
APN: aircelgprs
Leave all other settings blank
 

7. Idea 3G APN Settings (Updated) 


Idea cellular has won spectrum license in Maharashtra, Gujarat, Andhra Pradesh, Kerala, Punjab, Haryana, Uttar Pradesh (E), Uttar Pradesh (W), Madhya Pradesh, Himachal Pradesh, and Jammu & Kashmir.
To activate 3G SMS ACT3G to 12345
Name: Idea
APN: internet
Leave all other settings blank
 

 8. MTNL 3G APN Settings


To activate MTNL 3G
Prepaid : SMS `ACT 3G` to 444
Postpaid : Dial 1503
Name: MTNL
APN: “pps3g” (prepaid) and “mtnl3g” (postpaid).
Leave all other settings blank
The setting can be configured on all nokia s40 , s60 , symbian , samsung galaxy smart phones , HTC , LG , android based mobiles etc 

Saturday, 8 September 2012

blackberry shortcut keys


blackberry  shortcut keys, blackberry  shortcut key, blackberry  shortcut keys command, blackberry  shortcut key command,


escape ===== exit/stop screen
alt + escape
===== application/programs switching
space
===== select/check box clear
roll and trackball scroll horizontally
===== (any field) enter/edit/view text
roll and trackball vertically scroll vertically
===== (change options) go to/change different fields
end
===== home screen open/return

general key command_2 (message)

enter/space bar ===== scrolling down a page/screen
alt + enter
===== scrolling back a page/screen
b
===== page/list scrolling bottom
t
===== page/list scrolling top
u
===== jump/skip closest unread message (a list)
n
===== jump/skip next message
p
===== jump/skip previous message
backspace/delete
===== delete (type/message)
r
===== message reply
l
===== reply all
f
===== message forward
shift + scroll the trackball
===== select (highlight) text
shift + scroll the trackball
===== entire/all lines select
shift
===== start/begin selecting by character again
alt + trackball
===== release/free trackball
alt
===== anytime start/begin selecting by character
menu + trackball down
===== select entire/all line
menu + again trackball down
===== copy
trackball & select cut/copy
===== paste

general key command_3 (phone shortcuts)

send ===== answer/respond a call
send (any screen)
===== call log display/view
typing a phone number &  hold the letter o
===== insert/add a (+) plus symbol/sign
alt + x
===== an extension number add
press any key to assign then + phone number
===== speed dial number key
alt + letter
===== type a letter when in a phone number field
space
===== move to the top screen
escape + ok
===== stay in a return & call to the home screen

general key command_3 (browser 1 tips)

space (press twice) ===== (.) period insert
until the capitalized letter appears, hold the letter key
===== letter capitalize/block
alt + left shift
===== num lock
alt + right shift
===== caps lock
shift
===== turn off num lock/cap
space
===== insert a sign (@)/(.)
shift + roll the trackball
===== text highlight
shift + roll the trackball left/right
===== text character highlight
escape
===== cancel/stop text selection
shift + backspace/delete
===== cut highlighted text
alt + trackball
===== highlighted a text when typing
shift + trackball
===== highlighted text when typing paste
hold a letter + roll trackball
===== scroll through accent symbols, characters, equation & other marks/international
symbol (sym)
===== other sign/symbols

general key command_4 (media shortcuts)

mute ===== a video/song pause/resume
r
===== rotate picture
i
===== zoom in
o
===== zoom out
w
===== original size

general key command_5 (browser 2 tips)

space ===== add/insert a (.) period
shift + space
===== add/insert a slash symbol/mark (/)
o
===== browser options open
escape
===== web page loading end/stop
d
===== browser hide
escape
===== browser close
l
===== view/display the address for a link, highlight a link
shift + space
===== forward a screen, move
space
===== a previous screen, move
g
===== a specific page, move
h
===== home page return
k
===== bookmarks open
a
===== a bookmark add
i
===== web pages view/display recent
r
===== refresh/rearrange page
p
===== view/display page address
s
===== web page save
u
===== browser banner hide
x
===== view/display thumbnail version of a page
t
===== top of a page move
b
===== bottom of a page move 
general key command_6 (calendar)
c ===== appointment to-do list/schedule
a
===== agenda view/display change/modify
d
===== change to day display/view
w
===== change to week display/view
m
===== change to month display/view
space
===== move to the next day/week/month
shift + space
===== move to the previous day/week/month
t
===== current date, move
g
===== specific date, move
n or space
===== go to next (day/week/month)
p
===== go to previous (day/week/month)
trackball
===== new entry create
general key command_7
w ===== wap browser
r
===== alarm
t
===== tasks
u
===== calculator
o
===== options
a
===== address book
s
===== search
d
===== notes
f
===== profiles
h
===== help
k
===== lock keypad
l
===== calendar
m
===== messages
b
===== browser
n
===== blackberry messenger
v
===== saved messages
c
===== compose

android shortcut keys

general key command_1 (typing)

android shortcut keys, android shortcut key, android shortcut keys command, android shortcut key command,
menu + x ==== cut
menu + c ==== copy
menu + v ==== paste
menu + a ==== select all
shift + del ==== delete character (to right)
alt + del ==== delete a full/entire line
twice shift ==== caps lock start activate
shift once more ==== caps lock exit activate
alt + space bar ==== add a special character
alt + trackball left ==== move cursor (start/beginning of line)
alt + trackball right ==== move cursor (end of line)
alt + trackball up ==== move cursor (top of page)
alt + trackball down ==== move cursor (bottom of page)
shift + trackball left/right ==== copy/cut highlight text

general key command_2 (scrolling)

space bar ==== page down (web page/document display/view)
shift + space bar ==== page up (web page/document display/view)

general key command_3 (apps use)

search + b ==== browser start/open
search + e ==== e-mail start/open
search + c ==== contacts start/open
search + p ==== music start/open
search + g ==== gmail start/open
search + s ==== text messaging start/open
search + y ==== youtube start/open
search + i ==== calendar start/open
search + m ==== maps open

general key command_4 (browser)

menu + i ==== zoom in
menu + o ==== zoom out
menu + r ==== refresh present page
menu + k ==== go a page forward
menu + j ==== go a page back  
menu + f ==== find/search
menu + b ==== open/start bookmarks
menu+ a ==== add/insert bookmarks
menu + s ==== social network sharing menu open/start
menu + h ==== browsing history view/display
menu + s ==== browser settings start/open
menu + g ==== page info
menu + d ==== download
menu + e ==== select text

general key command_5 (gmail)
a ==== reply all present message
f ==== forward present message
r ==== reply to present message
y ==== archive/record message
menu + u ==== refresh/restore inbox
menu + c ==== new e-mail compose
enter ==== an e-mail open/start
alt + trackball up ==== jump/skip (top of inbox)
alt + trackball down ==== jump/skip (bottom of inbox)

Friday, 7 September 2012

Convert Videos For Android And iOS The Easy Way

A question that comes up often? “How do I convert videos for my Android or iOS device?” Apple iPhone users have iTunes for optimizing video, but the program lacks support for many popular formats. On the other hand, Google does not even offer a desktop client for managing multimedia. Our friends at Lifehacker and Tested each featured potential solutions, but I think the following solutions is even better: Miro Video Converter. While there are hundreds of apps that offer similar capabilities, this one is by far the easiest to use, is entirely open source, and actually looks fancy.

How To Convert

  1. Drag a video onto Miro Video Converter.
  2. Select a preset from the drop down menu.
  3. Hit convert, wait a few minutes, and that’s it!

You do not have to deal with aspect ratios, codecs, frame rates, resolutions, or any other technical jargon for that matter. In fact, those options are not even available for reconfiguring. One the progress bar hits 100%, the newly optimized video will appear besides your original file in the same folder.

Supported Devices

Miro Video Converter includes defaults for about eight Android devices and four Apple devices. The Sony PSP is also a preset for those that still use one. I should note that the listed Android smart phones are last generation models. The Atrix, Droid 2, and Droid X, and other recent ones are missing from the list. With that being said, the MP4 preset worked perfectly on the EVO and Thunderbolt. I am also doubtful that the program takes full advantage of the high-resolution playback capabilities of the new iPhone 4 and iPod touch, but converted videos still play without any glitches.

Supported File Formats


I dragged several video files into Miro Video Converter from various sources including Apple iTunes Podcasts, DVD rips, YouTube downloads, Vimeo files, and more. Every file was immediately recognized. For the geeky, the supported formats include AVI, H264, MOV, WMV, XVID, Theora, MKV, and FLV. The program can re-encode them to variations of MP4, Ogg Theora, or WebM.

Other Thoughts

Although I am definitely a fan of Miro Video Converter, I still keep Handbrake on hand. The latter is also open source and offers hundreds of exporting options. Those come in handy at times when you have a device that requires a peculiar resolution or another setting. I would definitely like the team at Participatory Culture Foundation add more presets for recently popular device and possibly even tablets. For the most part, Miro Video Converter should get the job done for most Android and iOS users. The program runs on both Macintosh and Windows, which should cover most grounds too.
Links: Miro Video Converter

Tuesday, 21 August 2012

Google Voice Actions/Assistant is Siri for Android

Looking for a quality Siri application for Android? Google Voice Actions is an Android 2.2 (Froyo) and higher compatible voice command service that uses Google’s many services to answer questions and control various functions on Android based smartphones.
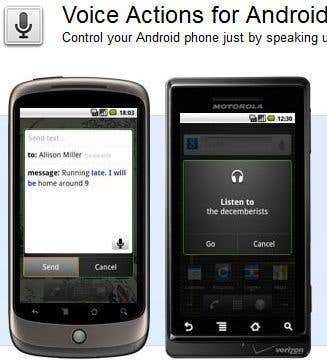
Google Voice Actions for Android
The Siri personal assistant app by Apple works fairly nicely with the iPhone 4S. However, Apple has placed stricter limitations on Siri. They won’t allow iPhone 4 or 3GS owners to run Siri without hacking their phones, and do not offer Siri as an AppStore download. So, if you don’t have a 4S, no Siri for you.
Google, on the other hand, offers a voice command function named Voice Actions that can be installed on any of their Android smartphones, version 2.2 or higher. This app is available for free download directly from Google, and it simply offers more compatibility with more phones.
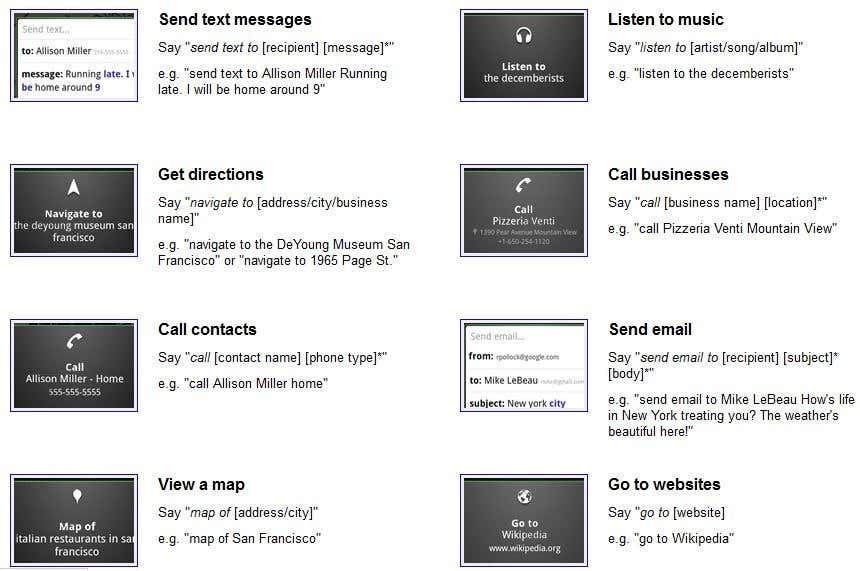
Before you install Voice Actions to your Android phone, you may want to know a little bit more about the software. Here are some examples of commands that are supported by VA:
Voice Actions 1
Voice Actions
The above screenshots gives some nice examples of the core voice command features that one would expect from a quality voice control app. However, those are only a few of the commands that the Voice Actions software recognizes. For an extensive list of VA commands, including things like “set alarm” or “navigate to” be sure to check out this official page on Google.
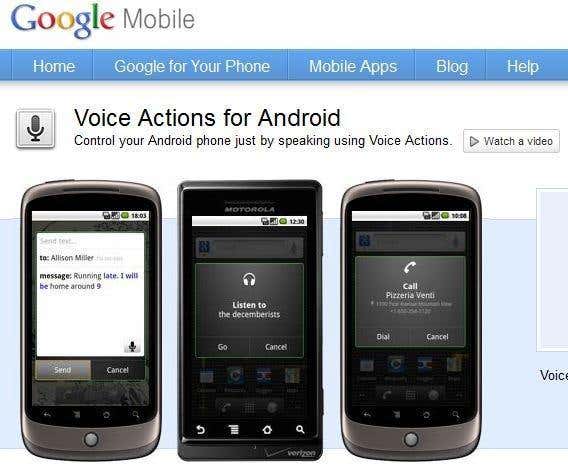
To get started with Voice Commands, simply launch the web browser on your Android based smartphone. From there, navigate to the Voice Actions homepage URL: http://www.google.com/mobile/voice-actions/.
Google Mobile Voice Actions
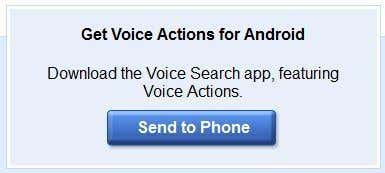
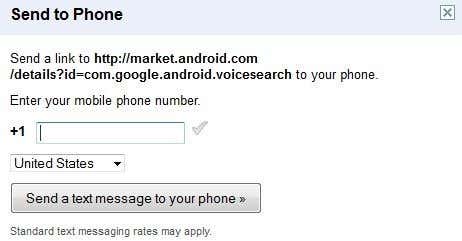
Next, begin downloading and installing the Voice Actions Android feature by clicking the Send to Phone button.
Voice Actions Send to Phone
Enter your mobile telephone number into the prompt box, select a country and click the Send a text message to your phone button.
Send to Phone Voice Actions
From here, Google will send you an SMS text message containing the Android Marketplace link to Voice Actions. Follow the link and proceed to install Voice Actions as you would any other app.
*You can also, of course, search for Google Voice Actions directly from the Android Marketplace app on your smartphone, rather than having Google text you a link.*
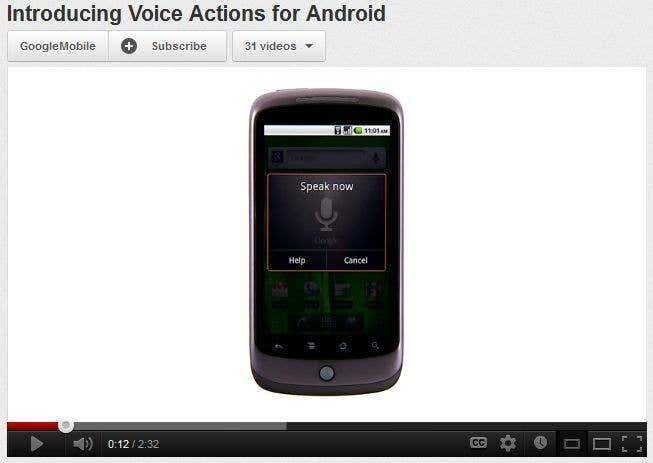
You can view a demo of Voice Actions from the YouTube channel.
Introducing Voice Actions for Android
Overall, Voice Actions is a fairly nice choice for Android users, as far as voice command apps are concerned. There are of course some 3rd party apps available in the Android Marketplace that have similar functions. Google’s app, however, seems to be one of the best reviewed choices and it is nearly as good as Apple’s Siri Personal Assistant for iPhone…
Nearly as good? As of now. However, look for Google’s software to maybe even surpass Siri in the near future. Google is pushing their voice command software a step further for their Android users, as Google Assistant, the upcoming replacement and next-generation of Voice Actions is set for release for download in Q4 of 2012, according to many technology news sites. Google Assistant was originally codenamed as Google Majel, a tribute to Majel Barrett-Roddenberry, the actress that did the voice for the Federation computer on the popular television show Star Trek, according to Wikipedia.
So, look for Voice Actions to be replaced by Google Assistant in the near future, for the majority of Android based smartphones; but until then, download and install VA, for Siri like functionality on a Google powered smartphone.
Thank you for stopping by the site for today’s post. If anyone has any other recommended voice command apps for Android phones, feel free to link to them in the comments section.

Install Android 4 Ice Cream Sandwich ICS on PC or Mac

Want to test out Android ICS 4 prior to purchasing an Android smartphone or going through the work of upgrading an existing phone to Ice Cream Sandwich? ICS can be installed on Mac or PC within a matter of minutes using a ready to go VM image.
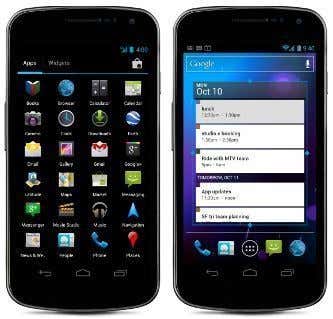
Android 4 Interface
To get started, you will simply need two files, maybe only one.
If you’re an existing virtual machine user, you may already have Oracle Virtual Box installed onto your Mac or PC. If so, then you only need to download the Android V4 VM Image.
Alternatively, if you don’t have Virtual Box, you will of course need to download both files. Begin by installing the Virtual Box software to your Mac or PC the same way you would install any other program.
With Virtual Box successfully installed onto your computer, you are ready to begin the tutorial.
Initialize the Virtual Machine
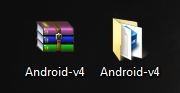
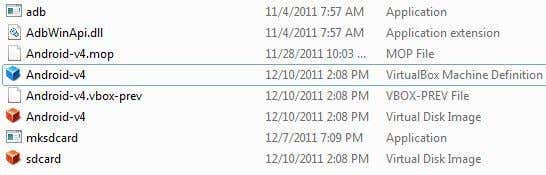
Start by extracting the RAR download of the Android V4 VM Image using WinRAR or a similar un-archive program.
V4 Unarchived
Open the Android-v4 folder and double click to launch the blue colored Android v-4 VirtualBox Machine Definition.
Virtual Box v4 definition
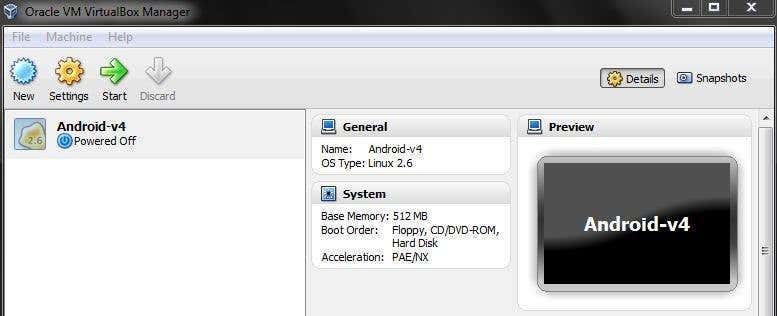
From there, VirtualBox should automatically launch with the Android VM added to the virtual machines list.
Vbox Android Machine
Click the Start button to power up the VM. From here, you may be presented with the following screen:
Android Startup Log
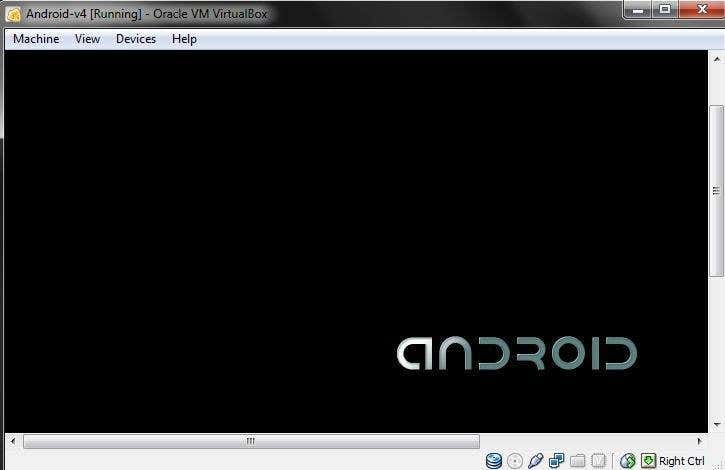
Select the option Android Startup from /dev/sda. Upon doing so, you will be presented with the default Android loading screen:
ICS Loading Windows
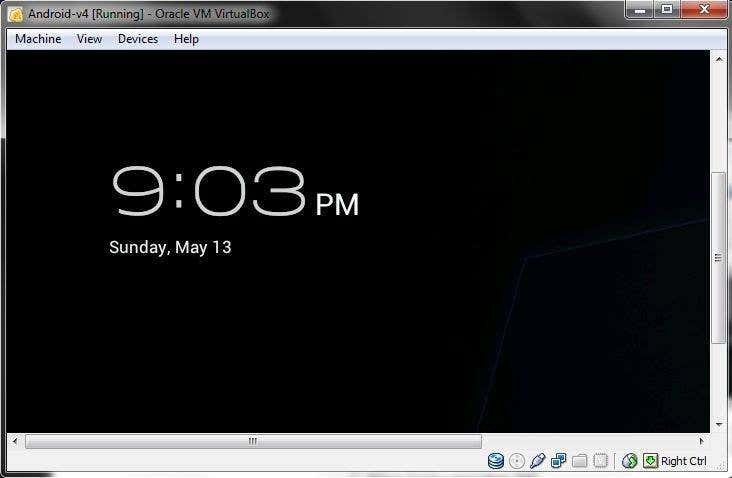
Once Android completes boot up, you will of course be at the home lock screen.
ICS Running Windows
Simply drag the lock button and circle, and you will be presented with the ICS 4 Home Screen.
ICS Windows Signed In
That’s basically all there is to it. From here, you can use the digital representations of the buttons to navigate around Ice Cream Sandwich.
Thank you for stopping by the site for today’s post. Did you catch our post on installing Windows 8 with Virtual Box? Virtual Machines offer a great way to deploy operating systems and test OSs like Windows 8 Beta and ICS. If any of our site visitors have any similar recommended ways to install ICS 4 on Mac or PC

Monday, 20 August 2012

How to Remove Password From Locked Memory Card and Recover Data


How to recover password using PExplorer ?
To recover your lost password from the memory card follow these easy steps:
  • Download and install PExplorer Symbian app on your Mobile Phone.
  • Start PExplorer and try to find C:\system location.
  • Now again search for file mmcstore and then copy it on your computer.
  • The Last and final step open mmcstorefile using Notepad Windows program. On notepad you will see your password of the memory card.[Download PExplorer Symbian app]
Related Posts Plugin for WordPress, Blogger...
trickstipsall4u.blogspot.com Webutation
MyFreeCopyright.com Registered & Protected

M

ad

Contact Me

flagcounter

free counters