Pages

Ads 468x60px

Showing posts with label Windows 8 Tips. Show all posts

Tuesday, 18 December 2012

Windows 8 Registry Hacks You Might Not Know

As Windows 8 gets closer to the final release, I’ve already started seeing a lot of ways to customize or tweak the registry! There are a lot of visual and under-the-hood changes in Windows 8 and not all of them can be changed via the GUI settings.
In this article, I’ll show you 10 cool registry hacks you can use to customize your Windows 8 install. I’m sure there will be a lot more customizations in the coming months, so feel free to post a comment and let us know any that you find.

Disable Charms Bar Hint

charms bar hint
The Charms bar in Windows 8 pops up the second you move your mouse to the top right or bottom right corner of the screen. I find it annoying because I do this by accident a lot. There is a registry key that lets you disable the hint so that the bar only opens when you move to the top or bottom right and then slide your mouse down or up along the right edge.
Prevent Charms Bar Keeps Opening by Accident in Windows 8

Desktop Icon Spacing

icon spacing
Thanks Microsoft for getting rid of the options to customize our desktop! What used to be so easy is now a registry hack! In order to change the desktop icon spacing (horizontal and vertical), you have to edit two values in the registry. Check out our previous post below.
Change Desktop Icon Spacing in Windows 8

Change Number of Row Tiles

number of rows
By default, Windows 8 will try to figure out the number of rows it should show on your Start Screen based on the resolution of your monitor. What if you don’t want the number of rows it determines? Well, you can change it to a different value if you like. As you can see, I decided on only two rows instead of having 5 rows. You can choose a value from 1 to 5. Navigate to the following key:
HKEY_CURRENT_USER\Software\Microsoft\Windows\CurrentVersion\ImmersiveShell\Grid
Create a new DWORD value here and name it Layout_MaximumRowCount. Give it a value between 1 and 5. Enjoy!

Disable User Account Control

uac
User Account Control is a different beast in Windows 8 and you can’t even fully disable it via the traditional GUI interface you see above. To actually turn it off, you have to go to the registry. However, there are a few unexpected consequences to disabling UAC in Windows 8, which you can read in full below.
OTT Explains – UAC (User Account Control) in Windows 8

Confirm File Delete Dialog

file delete dialog
Another missing feature in Windows 8 is the confirm file delete dialog we were all so familiar with. I never noticed it too much, but when I first deleted a file in Windows 8, I was shocked to see that the file just went straight to the recycle bin. I’m sure I’ll get used to it eventually, but if you really want it back, here’s how to get it back. Navigate to the following registry key:
HKEY_CURRENT_USER\Software\Microsoft\Windows\CurrentVersion\Policies\
Go ahead and create a new key under Policies called Explorer. Then create a new DWORD value and give it a name of ConfirmFileDelete. Change the value to 1 if you want the delete file dialog and 0 if you don’t want it. Sweet!
confirm file delete

Registered Owner

registered owner
Even though it’s so old and useless, I still like having the ability to change the registered own in Windows to whatever I like. Don’t ask me why, it’s just some weird geek thing from the early days of Windows. Luckily, Microsoft still has the value stored in a registry key which you can change to whatever you like.
HKEY_LOCAL_MACHINE\SOFTWARE\Microsoft\Windows NT\CurrentVersion
Under CurrentVersion, just find RegisteredOwner and change it. Also, note there is a RegisteredOrganization, you could could actually put two custom lines in the about Windows dialog. How do you even get to that dialog in Windows 8? Go to the Start Screen and start typing winver.

Paint Desktop Version

paint desktop version
If you’re running several copies of Windows 8 on multiple computers and in virtual machines like I am, it’s nice to have the Windows version painted onto the desktop automatically. Windows 8 has a registry key that enables you to add this to your desktop automatically. Navigate to the following key:
HKEY_CURRENT_USER\Control Panel\Desktop
Find PaintDesktopVersion under the Desktop key and change the value from 0 to 1. Next time you login, you’ll see the Windows 8 version number and build number.

Border Width

border width
If you don’t like the border size around all your windows while on the desktop, then you can change it by going to the following key:
HKEY_CURRENT_USER\Control Panel\Desktop\WindowMetrics
Find the key called BorderWidth and change it to any value between 0 and 50. It’s defaulted to -15, which is some odd numbering scheme employed by Microsoft which I don’t really get. Luckily, you can just use 0 to 50 for this registry setting instead of the crazy negative numbers.

Prevent Users From Uninstalling Apps

uninstall apps
By default, you can uninstall any app that you download from the Windows Store. However, it could be useful to create a user account for guests or your kids and then prevent users from uninstalling the apps. As you can see above, when I right-click on a metro app, the Uninstall options is gone! Navigate to the following key:
HKEY_CURRENT_USER\Software\Policies\Microsoft\Windows\Explorer
You’re going to have to create the Explorer key under Windows and under Explorer you’re going to need to create a new DWORD value called NoUninstallFromStart. Give that a value of 1 and then sign out and sign back in.

Enable Snap on Low Res Screens

snap windows 8
If you’re running Windows 8 at a lower resolution, you may not be able to snap metro apps to the right or left side of the screen. However, using a little registry hack, you can get the benefit even on lower resolutions. Navigate to the following key:
HKEY_CURRENT_USER\Software\Microsoft\Windows\CurrentVersion\ImmersiveShell\
Under the ImmersiveShell key, create a new key called AppPositioner. Under the new key, go ahead and create a new DWORD value called AlwaysEnableLSSnapping. Go ahead and give this a value of 1.
If you’re using Windows 8 and feel comfortable modifying the registry, feel free to play around with the options above and customize Windows 8 to your delight

Change Account Picture in Windows 8

I’m not a big fan of my current account picture in Windows 8, which always shows up in the Start Screen and really annoys me. I’m not really even sure how that picture got chosen as my account picture, but for some reason I must have uploaded it when I first created a Microsoft Live account.
Anyway, in this article, I’ll show you a couple of ways you can change the account picture in Windows 8 to something more desirable. Basically, you can either do it online by logging into your Microsoft account or you can do it thru Windows 8.

Change Account Picture Online

You can easily change your profile picture for you Microsoft account by going to profile.live.com and logging in. Once you are logged in, just go ahead and click on the Change picture link under your current profile pic.
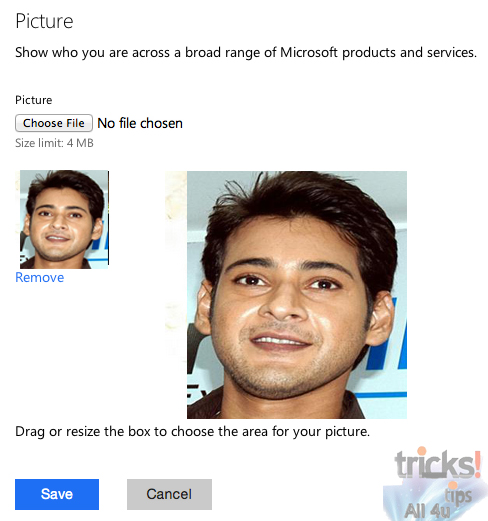
 Now you can upload a picture from your computer and then crop it using to the area you want. Click Save when you are done.

Change Account Picture in Windows 8

The other way to change the account picture is by opening the Charms bar, clicking on Settings and then clicking on Change PC Settings.
 Now you can click on Personalize if it’s not already selected and then click on Account picture. You can either click the Browse button or you can click on the Camera app icon and take a picture right from your web cam. It’ll even bring up a box that you can use to crop it and you can either click OK or retake the picture if you like.
 I have blurred myself as to not scary anyone! That’s about it. Two easy ways to change your account picture in Windows 8. Enjoy!

Split/Join Files With HJ Split Easy [Tutorial]

Download HJ Split Form Here
Tutorial For Split Files:- 1:- Open HJSplit & Click On Split...
2:-After That A New Window Will Be Open, Select File Which you want to split, Set File Size, and Click Start
 3:-After That file splitting will be start...
 4:-Now You Are Done, You will get 001 Files on your original File Location..
 Tutorial For Join Files:- 1:-Open HJ Split And Click On Join...
 2:-Select Your 001 File (which is you have already), & Click Start..
 3:- HJ Split Starts joining File & You will get you joined file on same location..
 You Are Done! Enjoy!

Thursday, 13 December 2012

Backups, System Images and Recovery in Windows 8

Just like the dual Metro and desktop interface and the dual Metro IE and desktop IE, you also have dual backups in Windows 8. Everything in Windows 8 is like a split personality: you have the new shiny Windows 8 style and features and then all the left over stuff from previous versions of Windows.
It’s the same with backups. In this article, I’m going to talk about the backup features in Windows 8 and how it’s a blend of new Windows 8 features and old Windows 7 backup options. In a way, it’s a good thing that you still have all the options you had before, but it’s also more confusing just like it’s confusing to have two different versions of IE 10! That really makes no sense to me, but that’s beside the point.

Windows 7 Backup Options in Windows 8

In Windows 7, you can still do everything you were able to do in Windows 7 in terms of backups and recovery. If you go to the Control Panel, you’ll see an option called Windows 7 File Recovery.
windows 7 file recovery
The dialog that pops up is pretty much the same one you see in Windows 7. You can Create a system image, Create a system repair disc, Set up backup or restore a backup if there is one available.
windows 7 backup
If you click on Create a system image, you’ll have a  choice of where you want to save the image. Only on Windows 8 Pro and Windows 8 Enterprise can you save the system image to a network location.
system image
Note that you cannot save the system image to any drive that is included in the system image. Creating a system image this way is a manual process. If you want to have it done automatically, you need to choose the Set up backup option.
This is the same as Backup and Restore in Windows 7. Basically, you choose where you want to save the backup to and then pick a schedule. The only thing you have to note is that you cannot create a system image if you backup to DVD. You have to backup to a hard disk or network location in order to have that option otherwise it’s greyed out.
backup to hard disk
By default, the system images are saved in the following format, where X is the drive you choose.
X:\WindowsImageBackup\PC_Name\Backup YYYY-MM-DD HHMMSS
For example, if I chose to save the system image to an external hard drive (E:), then I the location of the backup would be:
E:\WindowsImageBackup\AseemPC\Backup 2012-10-04 083421

Backup Restore Options in Windows 8

There are two ways to recover data from your backups in Windows 8. If you created a system image, then you have to boot to System Recovery Options in Windows 8 to restore the image. If you backed up using the schedule feature and picked files and folders, you can restore the files/folders from within the Windows 7 File Recovery dialog.
restore my files
Click on the Restore my files button and then you can go ahead and selectively choose which files you want to restore from the backup.
For restoring the system image, it’s a different procedure. Note that restoring a system image is a full restore, meaning that you can’t pick and choose what you want to restore, everything will be wiped out and replaced with the image. Restoring from a normal Windows backup allows you to restore individual files and folders.
To restore a system image, you need to boot to System Recovery Options in Windows 8. Once there, you need to click on Troubleshoot.
troubleshoot
Then click on Advanced Options.
advanced options
Then go ahead and click on System Image Recovery.
system image recovery
Next, you’ll have to choose an account and type in the password for that user account. You’ll then have the option to restore from the latest system image or choose a specific image, which you would do if you had the system image saved to an external USB hard drive, a network location or a DVD, for example.
system iamge backup
Once you have selected the image, you’ll have several options on how to restore the image to your computer. Note that you can only restore to a disk that is the same size or larger than the disks included in the backup image.

Refresh PC and System Images

In addition to the options above, you can also use a new feature in Windows 8 called Refresh PC. This is basically like performing a repair install in Windows XP or Windows 7. All system files are replaced and you essentially lose all your programs and settings, but you data stays intact.
This is exactly what Refresh PC does, but it’s a lot easier and really just takes a couple of clicks. The one caveat is that you can replace the default system image created when Windows 8 was first installed with a custom image. For example, you could install Windows 8, install any Metro apps, install any desktop programs, customize settings, etc, etc and then replace the Refresh PC image with your new custom image.
Now if you were to perform a Refresh PC, it would reload your custom image with all your apps and programs too! Much easier than going through the first method of creating a system image in Windows 7 File Recovery and then restoring it through System Recovery Options.
You can read my previous post on how to create a Windows 8 backup image that will replace the default image for Refresh PC.

File History

In addition to all the Windows 7 backup and restore options, the Refresh PC option, you also have another new feature in Windows 8 called File History.
file history
File History is turned off by default. Also note that if you are using a Windows 7 file backup with a schedule, File History cannot be enabled! You’ll see this message:
file history disabledYou have to turn off the schedule in order to use File History. This is kind of annoying since that means you’ll have to manually create system images if you like to have system images for your backups. Once you disable scheduled Windows 7 backups, you’ll see you now can turn File History on.
enable file history
It’s suggested that you use an external drive for saving the file history instead of a local hard drive or partition. You can also use a network location if you like. Actually, you can’t even choose a location on the same physical disk for File History. This is one advantage File History has over Shadow Copies, which was a similar technology in older version of Windows. If the drive dies, you can reinstall Windows 8, give it the same name as the dead system and then choose the same location for File History as the dead machine.
Once you have chosen a location, the Turn on button will be enabled so you can click on it. That’s about it, FIle History is now on! So what does that mean and what does it do?
Well, it basically saves versions of the files stored in your libraries, favorites, contacts, and a few other locations like Music, Videos, Pictures and Desktop. If you go back to File History after it’s made some copies, you can click on the Restore personal files option.
restore personal files
You can now browse through to a specific file or folder and navigate back and forth in time using the green blue keys at the bottom of the screen. Here’s an example of a text document I created and edited with some text.
windows 8 file history.png
If I click the left arrow key, I’ll see version 2 of 3, which has a little bit less text than version 3 of 3.
recover files windows 8
Pressing the green circular arrow button will allow you to restore that version of the file:
restore file
You can replace the file, skip it or see some comparison info on the files. Unfortunately, it won’t actually compare the content of the files, just the date and other info like the size, etc. File History sounds pretty good, but it has some serious issues in my opinion and with a lot of other people too, apparently.
1. If you rename a file, the history for that file is lost. It basically starts from scratch again. So renaming a file is pretty much the same thing as deleting a file and starting over. The old history still exists, just with the old name.
2. Following from point one, if you create another file with the name of the original file, the histories will be joined! So if you delete a file that had a history and then you create a new file with that same name, you’ll get the history of the previously deleted file too.
3. Copies are made of the entire file each time a backup is done. So if you have a 500 MB file that gets changed three times in a minor way, you’ll have three 500MB copies of that file.
4. You can’t backup anything other than files and folders. You’ll still have to rely on Windows 7 FIle Recovery for actually backing up your Windows 8 system.
5. You can’t include additional folders other than the ones pre-defined by Microsoft. This means if you want to use File History, you’ll have to move the data to one of the designated folders.
Overall, it’s all complicated system of backup options in Windows 8 that will most likely confuse new users. Hopefully this article sheds some light on the different options, their advantages and disadvantages and how you can use them in combination to create a robust backup plan for your Windows 8 PC.

Thumbnail Previews Not Showing in Windows 8 Explorer

I installed Windows 8 RTM on my home desktop a few weeks back and so far haven’t really had any problems. However, one odd thing that I noticed was that whenever I would view a directory that contained pictures or videos, I would just see the default icon for that file type rather than a thumbnail preview of the files.
So if I navigated to my Pictures library in Windows 8, I would get the photo icon for each image:
Pictures windows 8 icons
And if I viewed a directory full of videos in Windows 8, I would get the same thing, just with the default video icon:
Videos windows 8 icons
This was getting really annoying and I realized it was doing this since the time I installed Windows 8 on the PC. I’m not sure why it’s defaulted to this view instead of thumbnail previews like it is in Windows 7, but if you want the thumbnails back in Windows Explorer, here’s how to do it.
First, open Windows Explorer and then click on Options and Change folder and search options.
Folder and search options
Next, click on the View tab and uncheck the box that says Always show icons, never thumbnails.
Always show icons
Once you get rid of that checked option, you should now get thumbnails for all your pictures, videos and even documents.
View thumbnails windows 8
There is one other place that you can adjust the setting for showing icons or thumbnails in Windows Explorer. First right-click on Computer on the desktop and choose Properties. Then click on Advanced System Settings on the left side.
Advanced system settings
This will open up the System Properties dialog. Here you need to click on the Advanced tab and then click on Settings.
Advanced settings
Finally, make sure Show thumbnails instead of icons is checked.
Show thumbnails instead of icons
With these two settings, you should now be seeing thumbnail previews for pictures, videos, documents, and other file types in Explorer on Windows 8. If you’re still seeing just icons, post a comment here and I’ll try to help
Related Posts Plugin for WordPress, Blogger...
trickstipsall4u.blogspot.com Webutation
MyFreeCopyright.com Registered & Protected

M

ad

Contact Me

flagcounter

free counters